Written by Greg Acosta

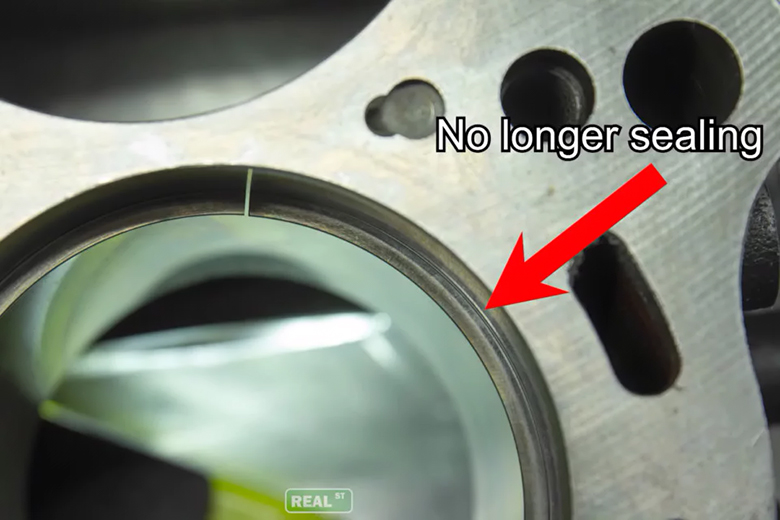
The ring gap allows the expansion of the piston rings in the bore – due to engine heat – without butting the ends up against each other. If there isn’t enough gap and the ring butts up against itself, it will distort the ring’s shape, causing a leak path against the cylinder wall. If the ring gap is too large, it will allow an excess amount of blow-by through the gap, hurting that cylinder’s performance.
In fact, getting the correct ring gap is so crucial and the tolerances so precise, that end gap is measured in each ring’s respective bore, to ensure the most accurate fit possible”. Ring gap is one of the few things in the assembly process you have complete control over. The rest of the stuff that’s done at the machine shop, you have to trust that they followed their procedures correctly. But if you’re filing the rings, it’s totally up to you to get them right,” says Jay Meagher of Real Street Performance.
Meagher has extensive experience in the automotive performance world, in a number of competitive disciplines, on both the import and domestic sides of engine performance. So, he’s no stranger to high-horsepower, max-performance powerplants. As such, he put together this video on the process for properly gapping piston rings, with some key tips and tricks to help make the process go smoother.

Measure Twice, Cut Once
Measuring you piston ring’s end gap is something you will do quite a few times for each ring that you file, and it’s a task in which extreme care needs to be taken, both in setting up the ring to be measured, as well as actually taking the measurement.
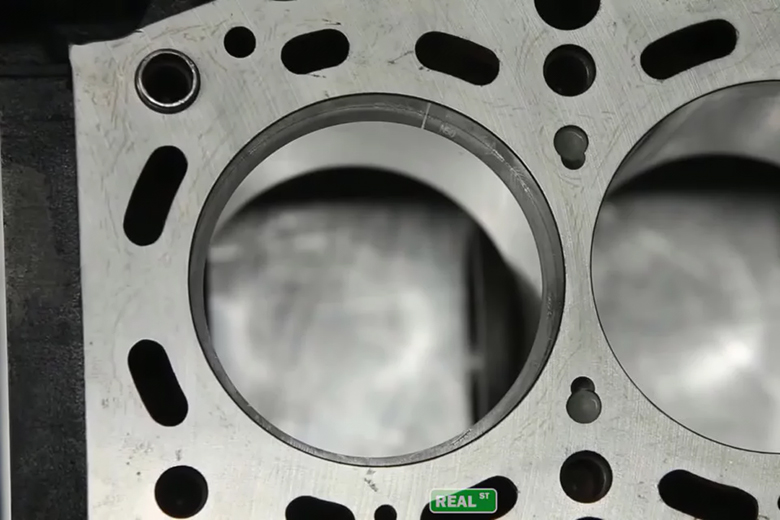
To properly measure your ring gap, you’ll need to put the ring into the bore. “You don’t want to twist the ring when you are loading it into the bore to measure. If you manhandle the ring, you can bend it, break it, or deform it, and it won’t be any good,” Meagher says. “Make sure to oil the bore so that the ring slides in easily, and then gently load the ring from the top”.
Once in the bore, the ring needs to be properly oriented in the bore, both for correct measurements in its proper spot, as well as repeatable measurements, since you’ll be pulling the ring out several times. “You can use a piston ring squaring tool, or what I use, one of the pistons we’ll be using in engine, to square the ring up in the bore,” advises Meagher.

“We’ve seen people make the suggestion to use a torque plate when setting end gap, to get a more accurate cylinder bore dimension. In my experience, that’s generally worth about .001 inch difference in the ring gap. Depending on your tuning and how hard you’ll be running the engine, you may want to take that .001 into account, or you may not. I haven’t found it to be overly critical and that the procedure can be done pretty well without the torque plates”.
When deciding on what your final gap should be, there will be a guide included with your rings which will generally give you a ratio of thousandths of an inch (of end gap) per inch of bore size. “You are almost always better off with a measurement that is too big rather than too small, because you want to make sure to avoid butting of the ring ends”, Meagher shares.
“We’ve run a lot of tests, and it’s always better to be on the high side of the ring gap spec. People seem to be afraid of the larger end gaps because they are worried about blowby, but we run crankcase pressure sensors, and we don’t see that once the engine is under boost”.
You’ll also notice that there is a different gap spec for the second ring as the first. The general consensus in the performance engine world is that you want to run your second ring gap wider than your top ring gap. “I like to keep a .004-.005-inch difference between the top ring and the second ring. Any combustion that makes it past the top ring, needs to make it past the second ring so that it doesn’t get trapped between the two rings and cause them to flutter”, Meagher explains.
Moving to your final ring in the package – the oil control ring – life gets simpler. “On the oil ring rail supports you just want to make sure there’s at least a .015-inch gap”, says Meagher. “If you find you have to file the oil rail, you might have the wrong ring in the box, because very rarely do you need to file the correct oil rail”.

You Can Always Take More Off, But You Can’t Add Any Back
All the measuring in the world won’t amount to anything, if you can’t properly alter those dimensions. While ring filing may sound simple, there are a lot of little nuances which make all the difference in a high performance engine.
One of the first things Meagher points out, is something that, without being told, is something you could only learn by messing it up. “Make sure you identify the top and second rings, and note it, as the top ring will be significantly harder material and harder to file”, says Meagher.
“When your top and second ring are different materials, if you get in a rythym when filing your second ring and then switch to the top ring, all of a sudden it’s not going as well, because the top ring is harder. Conversely, if you get into a rythym cutting the harder top rings, and then jump into the second ring with that same rythym, you can easily take too much off before you realize it”.
The actual act of filing rings can be more complex than it appears from the outside. With the coatings and finishes of today’s advanced piston rings, you need to be extra cautious not to damage that coating while filing the rings.
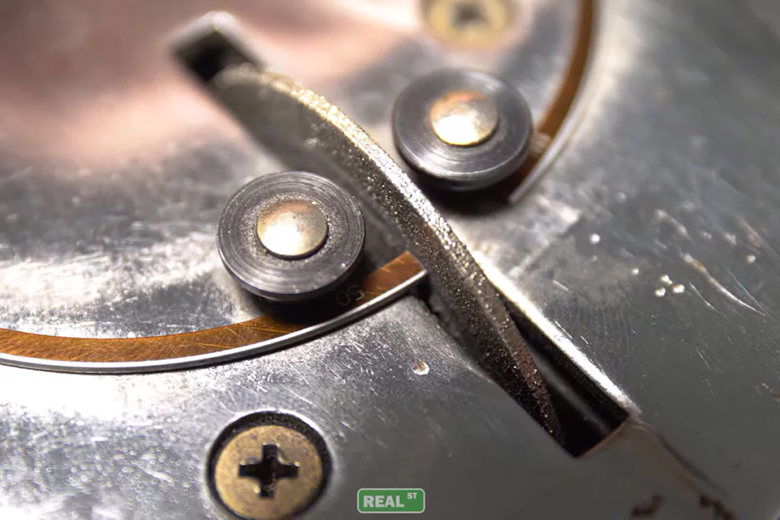
“You want to cut your ring end in a direction the ring is supported in. If you’re dragging the file away from an unsupported end, then the ring is going to want to move around and flutter, making it more likely to chip the ring”, explains Meagher. “You also don’t want load up the ring against the tool for heavy cut, as that could cause it to chip as well. You really just want to glide the cutter over the ring”.

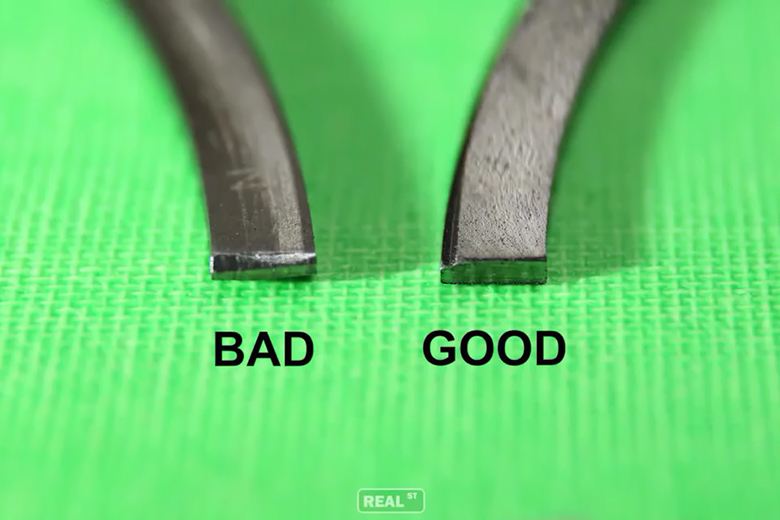
Another thing to be cautious of when filing your rings, is to ensure that the end is square to the file wheel. “When you have the ring in the filing tool, you have to make sure that you hold the end square against the cutter, so that you don’t put taper into the end of the ring”. Meagher says. “Also, only file in one direction and only work from one side of the ring to open the gap. Don’t file a little from one side, and then a little from the other”.
Finally Meagher adds, “Once you are at your target gap, you need to deburr the ring. I just use a small jewlers file to dress the edges. You’re not trying to take a lot of material off, just any material that might have formed a burr”.
Following these tips, working slowly and carefully, while measuring often, you can file your own rings like a pro, and will be sure to get the most out of your freshly rebuilt engine.
